TUTORIAL || Queen Clarion [Tinkerbell]
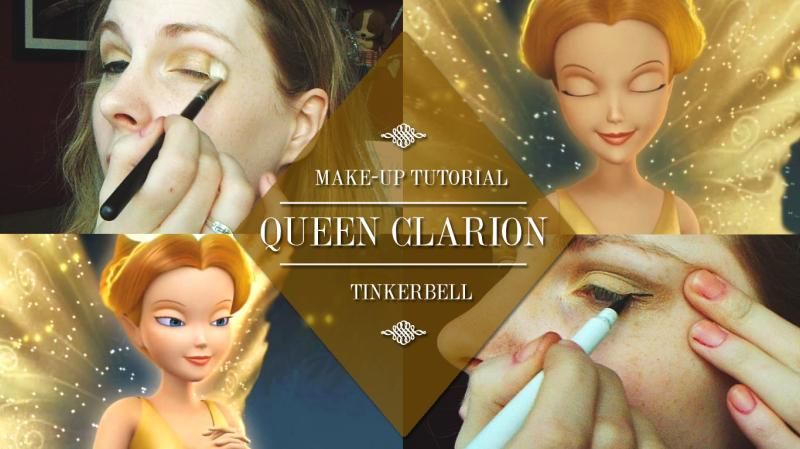
Happy Friday, everyone! I hope you're all doing well and that your week has been a good one. I have my first weekend off in a long time and I have a lot of work to do in my room. It's slowly but surely coming together. But that is nether here nor there because it is Fandom Friday or should I say, Fairy Friday. Today's Fandom Friday is a make-up tutorial inspired by Queen Clarion from the TinkerBell movies.
Like last week, I wanted to upload a video for this look. I filmed it, Like last week, I've had to take screencaps and explain everything as best I could. If you have any questions or concerns, feel free to leave a comment or email me directly.
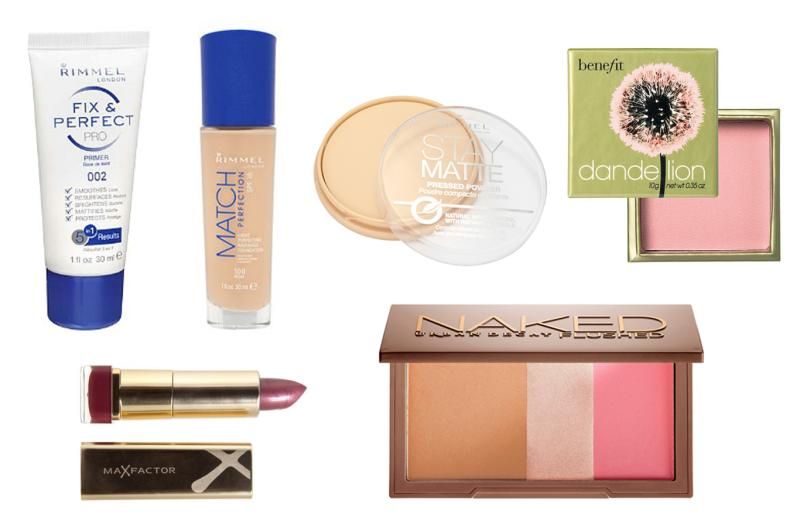
Make-up Used: Primer: Rimmel Fix & Perfect Pro
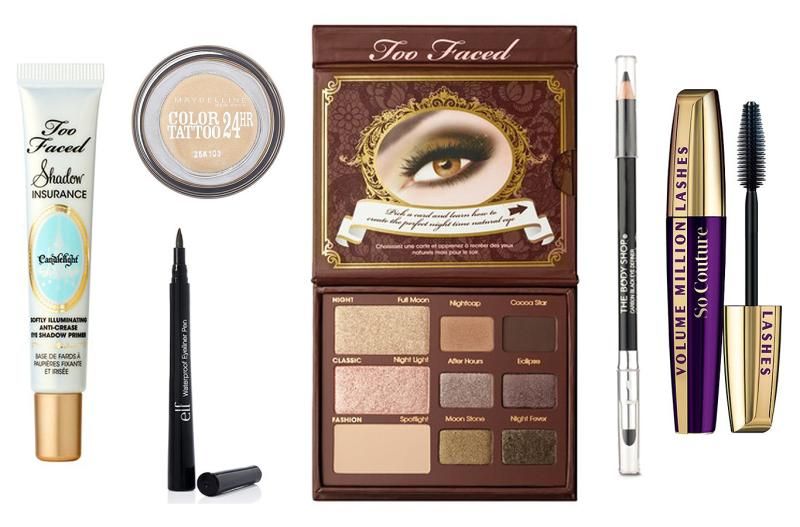
Eyeshadow Primer: Too Faced Shadow Insurance - Candlelight
Foundation: Rimmel Match Perfection - Ivory
Concealer: Rimmel Wake Me Up - Ivory
Setting Powder: Rimmel Stay Matte Pressed Powder - Translucent
Blush: Benefit Dandelion
Bronzer: Urban Decay Naked Flushed Palette - Streak
Hightlight: Urban Decay Naked Illuminated Shimmering Powder For Face & Body
Eyeshadows: Maybelline 24hr Color Tattoo - 05 Eternal Gold
Too Face 'Natural At Night' Palette
L'Oreal Paris Color Riche Mono Eyeshadow - 107 Macaron Vanille
Eyebrows: Rimmel Brow This Way Eyebrow Gel - Blonde
Eyeliner: E.L.F Liquid Eyeliner Pen - Black
Mascara: L'Oreal Paris Volume Million Lashes So Couture
Lipstick: MaxFactor Colour Elixir 837 SunBronze
Tools Used:Real Techniques Base Shadow Brush
Real Techniques Deluxe Crease Brush
Real Techniques Buffing Brush
Real Techniques Expert Face Brush
Real Techniques Pointed Foundation Brush
Real Techniques Contour Brush
Real Techniques Blush Brush
Real Techniques Retractable Kabuki Brush
Real Techniques Accent Brush
Real Techniques Detailer Brush
Sephora Italia Large Eyeshadow Brush
MAC 217
EYES


01 - To prime my eyelids and to make my eye-shadows last, I used Too Faced's Shadow Insurance in Candlelight. This primer has a gold tint to it with a gorgeous shimmer. It's perfect for Clarion's look.
02 - I then used Maybelline's 24hr Color Tattoo in Eternal Gold and applied this shimmery gold cream eye-shadow all over my eyelid with my middle-finger - it just happened that way. Once I had it applied, I used my Real Techniques Base Shadow brush to make sure that the cream shadow was evenly distributed over my lid.
03 - Using L'Oreal Paris Color Riche Mono Eyeshadow in Macaron Vanille, I used a little bit of this all over the lid to help set the cream eyeshadow beneath it using the same Real Techniques base shadow brush.
03 - Using L'Oreal Paris Color Riche Mono Eyeshadow in Macaron Vanille, I used a little bit of this all over the lid to help set the cream eyeshadow beneath it using the same Real Techniques base shadow brush.
04 - On my MAC 217 brush, I took the Full Moon shade from my Too Faced Natural At Night eye-shadow palette. You can use any fluff blending brush that you want; I prefer to use this. Taking this shadow onto my brush, I applied it to my crease and blended it back and forth in wind shield wiper motions until I got the consistency that I wanted.
05 - On the same MAC 217 brush, I took the smallest amount of the Night Fever shade from the Natural At Night palette. With the lightest of touch, I concentrated this on the outer corner of my eye and blended it into my crease. This shade is very pigmented and you only need to the smallest amount on your brush. To help get it blended, I flipped my MAC brush and used to other side to blend it out.
06 - Taking my Real Techniques Base Shadow Brush, I packed it with the Spotlight shadow from the palette. I patted this onto my eyelid, making sure that it was packed enough to cover the darker shadows.


07 - Using the E.L.F Cosmetics waterproof black eyeliner pen that my sister gave me for Christmas, I lined my upper lash line, taking the line out into a flick. You can use concealer to correct any mistakes and trust me, I make a lot of mistakes when it comes to cat eye flicks.
08 - I lined my tightline with the Eye-Definer eyeliner from The Body Shop. This is probably the most awkward part of the entire look. I always look like I'm being exorcised when I tightline my left eye. You can skip this step if you want to.
09 - Then use the same eyeliner to go along your waterline.
10 - Curl those eyelashes. I used my eyelash curlers from Ted Baker that I bought in Boots. Then apply some mascara. I used L'Oreal Paris' Volume Million Lashes So Couture mascara on my top and bottom lashes.
11 - I took the L'Oreal eyeshadow Macaron Vanille from before and applied it to my lid again. Then to bring some shimmer back to my eyelid, I took my Sephora large eyeshadow brush and dabbed it into the Maybelline Color Tattoo shade and applied that all over my lid.
11 - I took the L'Oreal eyeshadow Macaron Vanille from before and applied it to my lid again. Then to bring some shimmer back to my eyelid, I took my Sephora large eyeshadow brush and dabbed it into the Maybelline Color Tattoo shade and applied that all over my lid.
12 - Taking a small brush (I used my Real Techniques Accent Brush) I dipped it into the Night Fever shade and brushed it along my bottom lash line. NOTE:Wait for the mascara on the bottom lashes to dry before doing this. I made that mistake and needed a lot of concealer to fix it. D'oh! Or you know, be smarter than me and do this step before applying mascara.
13 - Finally, to give my eyebrows some much needed life, I took my Rimmel Brow This Way Brow Gel in Blonde and brushed this through my brows.
FACE & LIPS


01 - I've never done my make-up in this order before so it was interesting to do my face after my eye make-up. To prime my skin, I used Rimmel's Fix & Perfect Pro primer and used my hands to apply this all over my face. Wait a few seconds before applying foundation to allow it to settle on your skin.
02 - I used my much loved Match Perfection Foundation from Rimmel in the shade Ivory. From time-to-time I like to dot my foundation on my face first and then use my Real Techniques Buffing Brush to blend it in.
03 - I'm somewhat sloppy when it comes to applying my foundation but because I didn't want to interfere with my eye make-up, I dotted some foundation straight on my Real Techniques Expert Face Brush and used it to get closer to my eyes and eyebrows.
04 - For concealer, I applied Rimmel's Wake Me Up concealer in the Ivory shade in a V shape under my eyes and blended it in using the same Real Techniques Pointed Foundation Brush.
05 - To set everything I used Rimmel's Stay Matte pressed powder (Translucent) and used my Real Techniques Contour Brush to pat this onto my skin.


06 - To warm up my face, I took my Naked Flsuhed palette from Urban Decay (Shade: Streak) and with my Real Techniques' Blush brush applied it to where the sun would naturally hit my face; temples, hairline, cheeks and jaw line, not forgetting the neck.
07 - For blush, I used Dandelion from Benefit and used my Real Techniques' Retractable Kabuki Brush to apply and blend this onto the apples of my cheeks.
08 - Because Clarion is a Queen and a fairy, a bit of shimmer is a must on the cheekbones. My best-friend gave me the Naked Illuminated Shimmering Powder from Urban Decay for Christmas. This came with an applicator brush for you to use. I used this to hightlight the top of my cheek bones, my nose and chin.
09 - Taking my Real Techniques Deluxe Crease Brush, I dabbed it into the Urban Decay Illuminated Shimmering Powder and applied it to my brow bone.
10 - For the finishing touch, I used MaxFactor's Color Elixir lipstick in Sunbronze on my lips. To tidy everything up, I used my Real Techniques Detailer Brush.
And there you have it, my make-up look inspired by Queen Clarion from the TinkerBell/Pixie Hollow movies. I personally think that this look is great for people with blue eyes as the gold tones just make the eyes pop.


Please let me know what you think of this look and whether or not you like this type of tutorial where I share photos and instructions. My laptop does not like doing much these days and I cannot afford a decent video editing program or a new laptop. I have been trying to get more videos up for you guys but the Universe seems determined to thwart my every attempt. Drat! Double drat. Triple drat!
Have a great weekend, everyone.


it looks great, love the eyeshadow!
ReplyDeletexx danielle // shades of danielle // bloglovin
Thank you so much, Danielle!
Delete~ Kazzie xx
gorgeous make-up :) so lovely :)
ReplyDeletehttp://amelodyofdiaries.blogspot.co.uk
Thank you! I truly appreciate that.
Delete~ Kazzie xx
Wow, such a gorgeous look! I think this has to be my favourite one yet! I will have to try it out soon. Luckily I still have some of my Dandelion blush left (I only got one of the small Benefit collections). It really looks nice in combination with the eyeshadow. :)
ReplyDeleteKate xx
Awwww, you are such a wee dear! Thank youuuuu! I love, love, love the Dandelion blush. I think that it was my first real purchase from Benefit. I think I bought it before the sample collections. It's a great blush for the fairer skinned, i.e. me.
Delete~ Kazzie xx