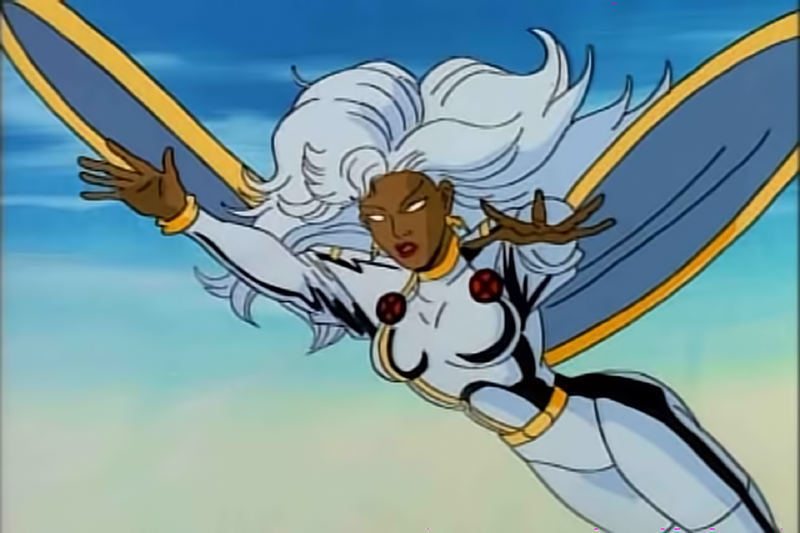
TUTORIAL || Storm [Marvel] Inspired Makeup Look

Holy crap, guys! This is my one hundredth post on this blog! I can't quite believe that I've already made it to 100 posts! I'm going to say the cliché thing of that it feels like yesterday I was at only 20 posts and wondering what the hell was I doing but here I am publishing my 100th post! Wowza! To celebrate, I thought that I would bring you all something totally different to what I've been doing. It's still Fandom Friday but it's a makeup look inspired by my favourite of the X-Men, Storm.
Storm is my favourite of the X-Men and always has been siince I first started watching the cartoons. The animated series was one of the first things that I watched on Netflix (the first being Power Rangers - I'm not kidding) and I'm beyond upset that it's not there anymore! Anyway, MadeYewLook on YouTube has recently been doing body-painting for her favourite Marvel characters (Wolverine, IronMan and Deadpool so far) and then doing matching wearable beauty looks on her MadeYewLookTwice channel. I've wanted to do more colourful looks for a while now and I was inspired by Lex to bring you a look using the colours of Storm.
I already did my face makeup for this look because it is mostly about the eyes in this tutorial but I used my L'Oreal Infallible Mattifying primer with the matching Infallible Foundation [Porcelain & Vanilla mixed together]. I used my Maybelline Fit Me Concealer to hide the blemishes and the huge bugger on my nose and then the Collection Lasting Perfection Concealer to highlight my under eye area and then bring the excess onto my eyelids to act as a primer. To set everything, I used L'Oreal's True Match pressed powder in the Rose Ivory shade. To add some warmth to my face I used the L'Oreal Glam Bronze Duo powder (Blonde) around the edge of my face and cheeks before adding the Max Factor Creme Puff Blush in Lovely Pink. Then because this look involves eyeliner, I did my eyebrows first and used my Soap & Glory Archery eyebrow pencil. For lipstick, I used Maybelline's ColorSensational lipstick in Vintage Beige.
Now with all that being said, let's get to the fun part - the eyes!


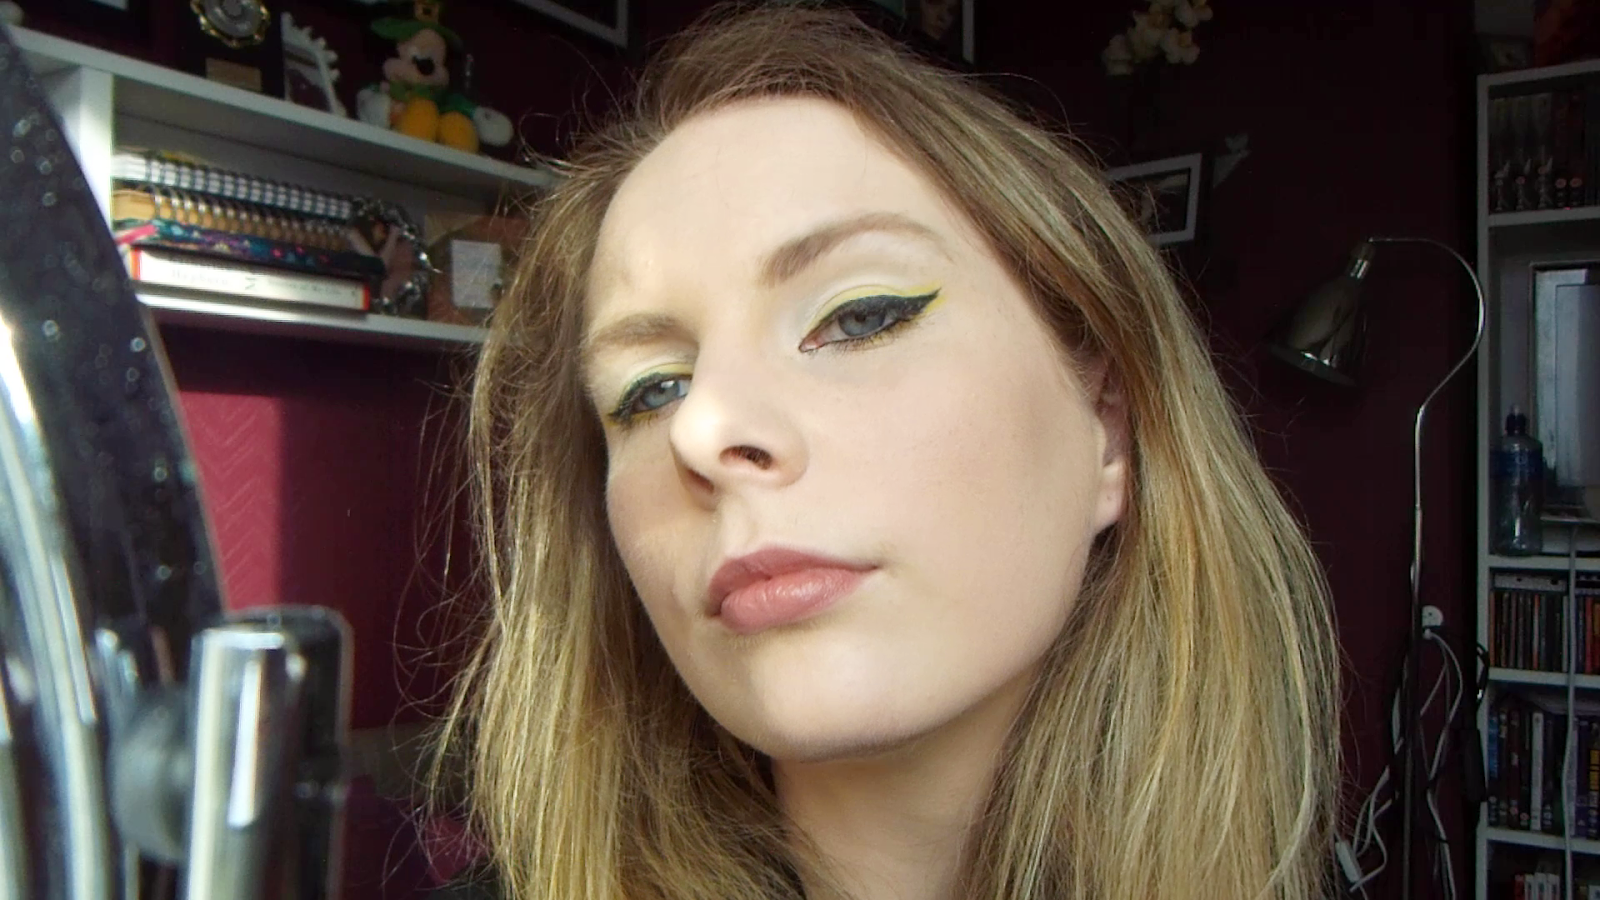
- I've already primed and set my eyelids as I already mentioned. I took my Make Up Revolution Ultimate Eyeshadow palette that has an astounding 144 eyeshadow colours. I took the white eyeshadow and applied that all over my eyelids using a Sephora Wide Eyeshadow brush. This eyeshadow isn't the most pigmented and I had to use several layers for it to actually show up, even going back in again once everything was done. You can use any white eyeshadow that you want.


- I lined my eyes first with eyeshadow before going in with the actual eyeliner. To do this I used Wet N Wild's Mono eyehadow in the shade 'Panther' on a Real Techniques Fine Liner Brush. I draw the flick first before lining my eyes and connecting the flick. That's just the way that I do it but you can do whatever you want.


- Using ELF's Waterproof liquid eyeliner pen, I traced over that line of eyeshadow and thickened everything up. I took the liner all the way across my upper lashline and around my tear duct. One eye was better than the other but the flicks matched so I was happy about that. This is what happen when filming with sunlight in your eyes.


- Using the angled side of a EcoTools duo eye-enhancing brush, I took the bright yellow eyeshadow from the Make Up Revolution palette. I placed it just above that black eyeliner. Again it took a couple of layers to get the pigmentation that I wanted. I simply followed the line that I drew. You can totally do the yellow part first and do it majorly thick and then go in with the black eyeliner. Of course, you can use any yellow shade that you want.

- Then using that same brush, I brought that yellow eyeshadow down onto my bottom lashline, going about half way across. I also brought it under that flick and made the two yellow lines meet. Great face, Kazzie!


- I took my Helen E Soft Black liner and lined my lower lashline and took it up into my tightline. I took this liner all the way to my tear duct which I had already lined using the eyeshadow and eyeliner.


- I curled my eyelashes with my Ted Baker eyelash curlers and coated my top and lower eyelashes with a couple coats of Maybelline's The Rocket mascara. This mascara is so black and I love it! It's the one that I reach for when I want those eyelashes that are beyond anything else!


And there you have it, my 100th post and a makeup look inspired by my favourite of the X-Men, Storm. I hope that you enjoyed this tutorial and I just want to thank you all for being with me as I hit this milestone of 100 blog posts. I want to thank each and every one of you for taking the time to visit my blog and for reading my posts. It means the absolute world to me as there are so many other blogs out there that are incredible and undoubtedly so much better than mine so I truly appreciate that you took the time to read my ramblings as I discover more and more about makeup and share my newfound passion for it. Here's to the next 100 posts.


that palette is absolutely massive im so jealous!! such a great tutorial, thank you for sharing. id love it if youd comment back http://www.amyelizabethfashion.com/2015/03/spring-clean-your-mind.html xx
ReplyDeleteIt's a great palette for more colourful looks without breaking the bank. It was only £10 when I bought it. The longevity isn't great in it but when it's for a fun look, can't beat that value.
Delete~ Kazzie x
Yay! Congrats to your 100th post! I actually read it last Friday but completely forgot to comment on it (silly me). It is so amazing that you have reached this milestone! *throws confetti*
ReplyDeleteAnyways, great post as well! I love the look. Seeing you sport colorful eye make up makes me want to try it out too. Especially since it looks so great on you!
xx Kate